Building My Industrial Pipe Standing Desk
While preparing to move into a new home, I decided it was time for a change in my work-from-home office. I’ve seen articles saying standing desks are the way to go and articles saying it’s nonsense. I’m the kind of person that gets lost in work and forgets to take breaks. Years of this has strained my hip flexor and seemingly deteriorated my knees to the point I wanted to try a standing desk no matter what articles had to say.
My first choice was a $500 IKEA Bekant standing desk. While it’s adjustable, I wasn’t crazy about the look (or cost). And moving into a new home, I was redesigning my office color scheme and style and wanted a more industrial-modern look.
That’s when I came across Jessica’s Blog about how she built her standing desk using iron pipes you can get from any Lowe’s or Home Depot. So, I decided to build my own desk using 1″ black iron pipe (cheaper than the galvanized steel).
Parts list (and prices excluding tax):
- 4 flanges ($6.84 each)
- 6 tee joints ($4.18 each)
- 4 end caps ($2.49 each)
- 4 6″ nipples ($3.16 each)
- 4 8″ nipples ($3.68 each)
- 1 48″ pipe ($17.76)
- 1 10′ pipe ($20.21) (this would be cut and threaded into 4 30″ pipes)
- 16 #12 5/8″ flat head wood screws ($0.98 per 4-pack)
- 1 72″ IKEA kitchen countertop (I got the HAMMARP @ $119)
Additional supplies:
- Spray paint (Rustoleum Hammered Silver $5.76)
- Denatured alcohol ($7.29)
- Cleaning rags ($4.98)
- Vinyl gloves (or equivalent) ($2.98 10-pack)
- Clear wood stain ($11.68)
- Staining pads ($3.98)
- Drop cloth (or equivalent) ($0.98)
 I mostly followed Jessica’s Blog design, but I didn’t want the desk as tall as she built it, and instead of painting it flat black and using a degreaser, I used denatured alcohol to wipe down the pipes since I was going to spray paint the finished build. I used some store-bought rags, but you can certainly use anything you have laying around that you don’t mind throwing away afterwards–same for the drop cloth.
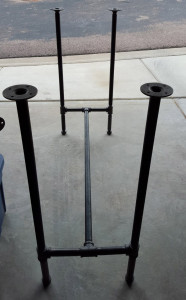
My cheaper way around how Jessica built hers (with 33″ custom-cut pipes) was to buy a single 10-foot pipe and have Home Depot cut it into 4 even 30″ pipes since I’m short (if you need a taller desk, you’ll probably spend a bit more to cut more pieces down to get the 4 longer pipes). The problem was I didn’t end up with 4 even 30″ pipes. Between the longest pipe and the shortest one, I ended up with a 1/2″ difference, which doesn’t sound like a lot, but when you’re hand-tightening all the pieces to get 4 even legs for balance, it makes a big difference.
This resulted in me clamping down the longest piece I had extra tight to the top flange (I had to go to Home Depot and have a guy help me with 2 pipe wrenches to tighten it as much as possible), and extending the shortest piece with a looser connection to the flange. To do this (since the connection was loose to get the right length), I needed an equivalent of a super glue for metal. I got a recommendation from the gentleman at Home Depot again to try Loctite Threadlocker (red), which he said would form a permanent bond. Simply apply a small amount (you don’t need much at all–practically just a trace of red liquid) around the thread and inside the pipe, attach the pieces to your 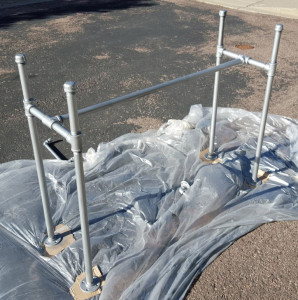 desired length, and wait 24 hours. The two caveats to this product are 1) when it dries, it is secure and permanent, and 2) if you apply it after you’ve painted and it drips onto a visible area of the pipe, it’s tough to spray paint over, so do this before you paint (if you have to do this at all).
Next was paint. I decided on a hammered silver look. The natural silver galvanized steel pipes by themselves look fantastic, however, since they were more expensive, I went with the black iron, which required me to spray paint them. The Rustoleum Hammered Silver doesn’t come out hammered, but it’s a nice industrial/modern look anyway.I did 2-3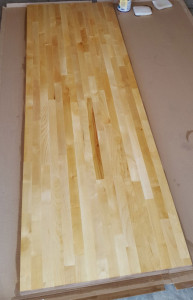 coats to cover everything evenly.
Thanks to IKEA, there is a nice selection of countertops in 74″ length (but no shorter). So as long as you are OK with that length, you can find a top with the material and color you want from anywhere from $69-$149. You could cut the counter to a shorter length, but the one I chose had a slightly beveled (and sanded) smooth edge that I didn’t want to disturb. I went with the multi-colored birch Hammarp for $119 and used a clear wood stain.
I think the toughest part of the build was evening the legs and then centering the countertop wood to the legs. But once done, I drilled pilot holes (4 for each flange) and used #12 5/8″ flat head wood screws to secure the desk top to the pipe frame. Voila!
The best part about this kind of desk is how you can add accessories to it: hooks, stands, shelves, etc. I decided to then add 2 hanging pipe shelves (one of each side), mounted underneath. I used 1/2″ pipe to essentially make a J shape with a flange on top to mount to the underside of the desk top and another flange to mount to a shelf board. I followed the same cleaning and painting steps for the desk, bought a 47″ Ekby Tryggve shelf at IKEA for $6.99, had Lowe’s cut it in half (at no cost), and I have shelf tops for each side of the desk.
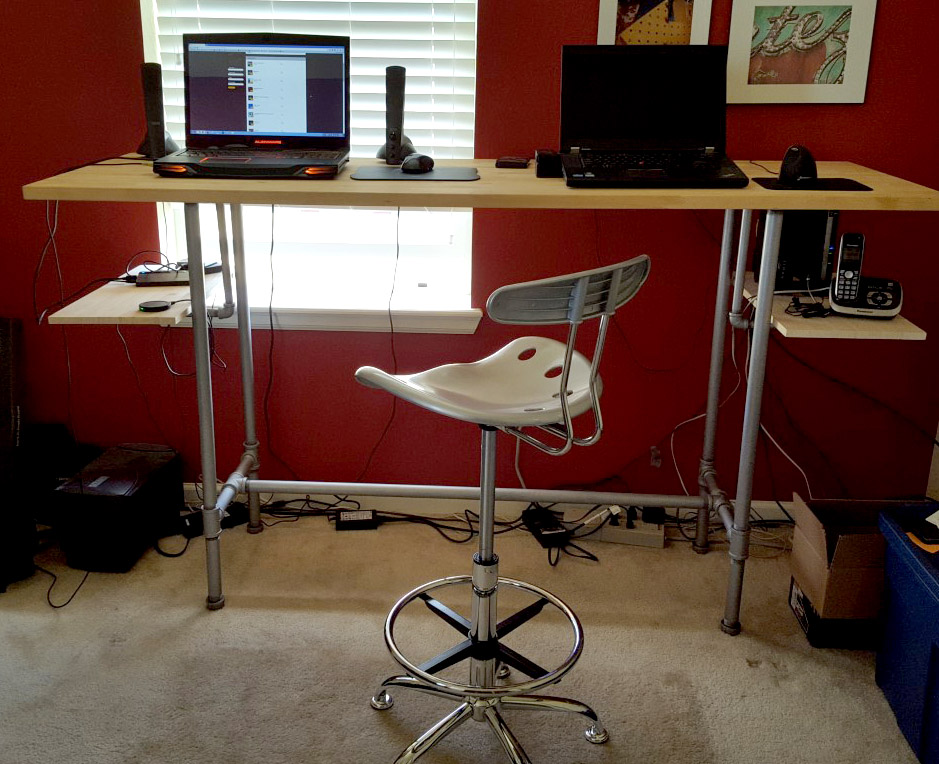
This is my finished product, along with an inexpensive silver tractor seat stool for $53 (available in almost 20 different colors and surprisingly comfortable when you need to sit down for short periods of time):

Total cost of desk only (not including added shelves) with tax: about $311. The 2 hanging shelves I added ran about $53 total.
Check out how I built my matching pipe bookshelves!
Pingback: 21 Simple DIY Pipe Desk Plans You Can Build Your Own Desk - Lemon Slide
Pingback: 24 Free DIY Pipe Desk Plans - DIY Crafts