Creating a Multi-Language Course In Storyline That’s “Shift-on-the-Fly”
There are likely plenty of explanations of ways to create a multi-language course using Articulate Storyline, but like opinions on the internet, what’s one more?
The method I’d like to show uses single-threaded development, not branching. Branching is certainly easier to develop, because you can create separate slides for each language, however, there are some potential issues with that method:
- Your project will have more slides as it needs (e.g., if you’re doing 3 languages, you’ll have 3 times as many slides).
- If you use # of slides viewed as your completion trigger, you can run into inaccuracies if anyone switches between languages and views different branches.
- If I user wants to change languages, they’ll have to go back to the beginning of the courses and start over, most likely.
What I want to show allows the user to change whenever they want and the course will immediate adapt. While I’m showing uses for multi-language, this method could also be used for a character choice (male or female) or any number of ways you’d want to switch between characters or roles during a course. So let’s get started.
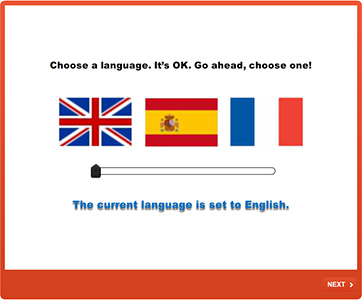
Here is the link to the demonstration of what I’ve put together. In this case, I used a slider (using Storyline 2) to choose between languages, but you could also just make them clickable buttons just as easily.
This uses triggers and variables, of course. Each time the slide loads, it checks to see what the language variable is set at based on the user’s most recent selection. If you slide to each language on the first slide in my example, you’ll see the text adapts immediately. This is due to a trigger telling the page to reload (jump to slide) any time the variable changes.
On the next slide in the example, there are two things going on:
- The small flag menu in the upper-right, where the user can change languages on a page-by-page basis. Much like the first page, when a new language is selected, the slide reloads and presents only the new language.
- The content displays text and audio using the chosen language, and only that language.
What’s nice is that only the language elements (in this case, screen text and audio narration) have to change. Anything else on the slide, including images or animations, don’t have to change or be redone. And if any of those elements have to be updated, you only need to edit a single slide, not one for every language branching slide you created.
Once you have a content slide created, you should just be able to copy that slide throughout (maintaining the integrity of the upper-right flag menu, in this case) so it doesn’t have to be recreated.
So how was this all done? Here is the Storyline 2 file I created with this if you’d like to follow along. These steps describe this multi-language set-up, so if you’re doing something different, use appropriate variable names and such.
Main Language Selection Slide (slide 1.1)
- Create a variable for your language. In this case, I called it LANG and set the default to EN (English). Spanish will be ES and French will be FR.
- The trigger on the slider is set to change the LANG variable to the correct language when the value changes (if slider is at value 0 (it’s default starting position), LANG is set to EN; when slide value changes to 1, the LANG variable changes to ES; when slide value changes to 2, the LANG variable changes to FR).
- Create a text box/image showing the current language selection. For this demonstration, I used a text box that starts with “The current language is set to English.” I then created 2 more text boxes, each saying the same thing in Spanish and French (thank you Google Translate).
- I set the starting state of each of those text boxes to Hidden.
- I create a trigger for each text box that tells it to change its state to Normal when the LANG variable for the selected language is selected –> Change state of (English text box) when timeline starts if LANG is equal to EN. Do the same for the other text boxes and adjust the language.
- I create triggers for the slider also to show the correct setting based on the current language selected –> Set slider value to 0 when the timeline starts if LANG is equal to EN. Do the same for values 1 and 2 on the slider for each respective language.
- I then create a trigger to jump to the current slide anytime the LANG variable changes –> Jump to (current slide) when LANG changes. This is how the content “shifts on the fly” to show the current language.
Content Slide Upper-right Flag Menu (slide 1.2)
- Each flag needs to have a new state created. Don’t use Hidden. I used Disabled and changed the color for those states to something lighter. Make Disabled the initial state for each flag.
- Create a trigger for each flag to change the LANG variable to the appropriate language when clicked.
- Create a trigger for each flag to change its state to Normal if LANG equals that flag’s language when the timeline starts.
- Again, create a trigger to jump to the current slide anytime the LANG variable changes. this will ensure the correct flag is always showing when the slide loads.
Content Slide Text, Narration, and Graphics (slide 1.2)
This is a pretty simple slide, showing only a female character, a talk bubble, and narration. Only the talk bubble text and narration have to change. Although, if you wanted to create a unique character for each language, you could do that also and follow the same steps below. In my example Storyline 2 file, I didn’t categorize objects by language, but it might be advisable to make it easier to turn visibility on and off as you’re editing and arranging items on the slide.
- Create your talk bubbles with text for each language. Each should have their initial state changed to Hidden.
- Create a trigger for each talk bubble to change its state to Normal when LANG equals the chosen language when the timeline starts.
- Add your narration audio for each language.
- Create triggers for each audio narration file to play that media when LANG equals the chosen language when the timeline starts.
Now if you run the course, you’ll see the talk bubbles and narration associated with the selected language is the only thing you’ll see on each page, and you’ve done it with a single thread of slides, not branching.
Make sure none of your slides are set to “resume saved state” or the “shift-on-the-fly” function won’t work. However, even if you don’t need the slides to instantly change, this method will still work, as the intent is a single thread of slides (for hopefully easier editing and no duplication of slides) vs. branching.
I’d love to hear how this works for you if you decide to try it, and if you have questions, don’t hesitate to ask!